How to easily migrate pages from Drupal 6 CCK content types to Drupal 7 fields using the Feeds module
![]() One of the easiest ways to upgrade between version 6 and version 7 of Drupal is to re-build your site in Drupal 7, and then use the Views Data Export and Feeds XPath Parser modules to move your pages and articles into your new site.
One of the easiest ways to upgrade between version 6 and version 7 of Drupal is to re-build your site in Drupal 7, and then use the Views Data Export and Feeds XPath Parser modules to move your pages and articles into your new site.
This post shows you the details of setting up both a D6 View you can export and a D7 Feeds importer you can use to migrate that View content.
Update: You might find the code attached to the "Feeds is my Friend" post helpful in supplementing these instructions. And I now recommend using the Features module to make it easy to copy Content Types, Taxonomies, Menus, and Feeds Importers from your test to production sites.
- Before you begin
- Set up your old D6 site
- Set up your test site in D7
- Known import Problems
- For more information
Before you begin
- Read other good posts on general updating strategies:
- Do a COMPLETE backup of your site (files, database, everything).
- Create a SEPARATE Test site to use for this process, so you don't kill your Live, Production site.
Set up your old Drupal 6 site
- On your old D6 site, install Views, Views Data Export, CTools & any modules they depend on.
- I'm using "Views Data Export", instead of the RSS display that is native to Views, because RSS made it difficult to output the path and Date fields correctly.
- Finally, create a separate View for each content type you want to move.
View settings in Drupal 6
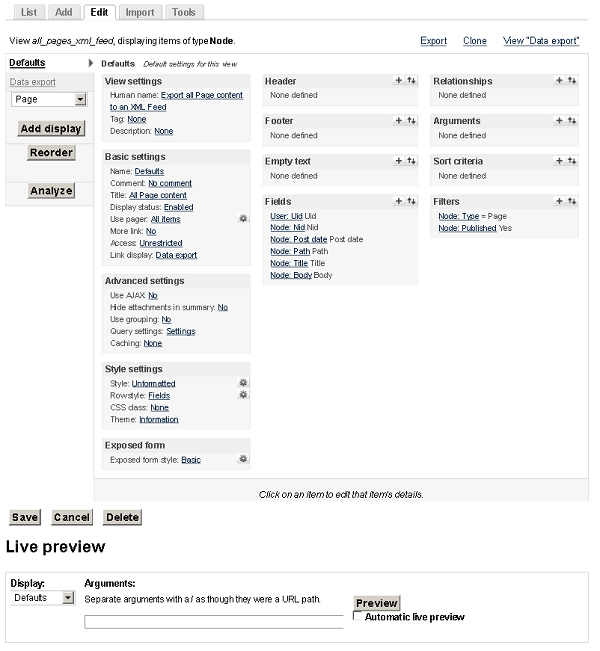
- Add a view type of "Node"
- Set filters for only Published Pages.
- Add fields for each bit of data you want to migrate, such as these common fields:
- Uid
- Nid
- Post date
- Path
- Title
- Body
- Add a "Data Export" display to the View.

- Under "Style settings", choose "XML file". For "Data export: Style options", UNCHECK "Provide as file" and DO CHECK "Transform spaces". For Transforming spaces, choose "Dashes", because XML does not process element names if they have spaces in them.

- Under "Data export settings", set a "Path" to this new feed. For example: feeds/pages/all.
- Under "Fields", choose "Node: Path" and, under "Rewriting", check "Rewrite the output of this field". Enter
[path]into the the text box, so that you will only get the internal path and not an entire URL.

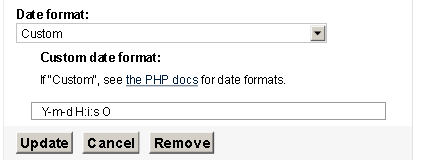
- Again under "Fields", choose "Node: Post date" and, under "Rewriting", check "Rewrite the output of this field". Enter
[created]into the the text box, so you can change the date formatting. For "Date format", choose "Custom" and enterY-m-d H:i:s Ointo the text box, this will output your date in a format that will be easier to import into the new Drupal 7 site.
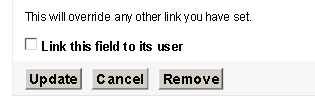
- Don't link "Title" or "User" fields to their nodes, or they will output link tags in the feed.
- Under "Style settings", choose "XML file". For "Data export: Style options", UNCHECK "Provide as file" and DO CHECK "Transform spaces". For Transforming spaces, choose "Dashes", because XML does not process element names if they have spaces in them.
- SAVE your View, or all your changes will be LOST!
XML feed output from Drupal 6
When you click on the link to your new Feed (http://mylivesite.gatech.edu/feeds/pages/all), you may see something like this XML code:
<?xml version="1.0" encoding="utf-8" ?>
<nodes>
<node>
<Uid>2</Uid>
<Nid>71</Nid>
<Path>/about/staff</Path>
<Post-date>2011-04-28 13:04:39 -0400</Post-date>
<Title>Our Staff</Title>
<Body><p>Our employees are brilliant! And attractive, too.</p></Body>
</node>
<node>
<Uid>2</Uid>
<Nid>81</Nid>
<Path>/about/location</Path>
<Post-date>2011-04-28 13:06:27 -0400</Post-date>
<Title>Our Location and Hours</Title>
<Body><p>More fascinating HTML goes here, including an <a href="http://mysite.gatech.edu/fakedirectory/pagename">absolute link</a> whose URL may need replaced if I am changing my site's Domain Name.</p></Body>
</node>
</nodes>
Set up your test site in Drupal 7
- Set up your new D7 site with whatever themes, modules & configurations you would like.
- Create custom content types with the same fields as you used in your Drupal 6 site. The Features module will speed up your CCK re-creation, it allows you to import a generic content type with a pre-set collection of fields and settings you often use.
- Warning: pay attention to Text Input Formats or you might strip out important HTML tags from your Body field when importing. So, allow all users (for now) permission to use the "Full HTML" text format. Likewise, set the default text format for your new Page content type to use "Full HTML".
- Install Feeds, Feeds XPath Parser, CTools & any modules they depend on.
- Warning: the Pathauto module, if enabled, will overwrite/re-create path aliases for all the pages you import, so you might want to disable Pathauto before importing.
Feed importer settings in Drupal 7
- Add a feed importer at
http://mysite.gatech.edu/admin/structure/feeds. - For "Basic settings", choose:

- Attach to content type: "Use standalone form".
- Periodic import: "Off"
- CHECK: Import on submission
- For "Fetcher", use "HTTP Fetcher" and choose:
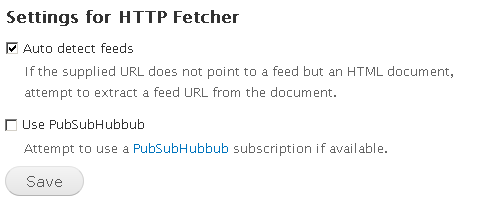
- CHECK: Auto detect feeds
- For "Parser", choose "XPath XML parser".
- For "Processor", choose "Node processor" and then use these Settings:

- Update existing nodes: Replace existing nodes
- Text format: Full HTML
- Content type: Page
- Author: YourUserName (Note: To import page authors, you have to import your users BEFORE importing pages).
- Expire nodes: Never
- For "Node processor Mapping", add "XPath Expression" for each of these fields:
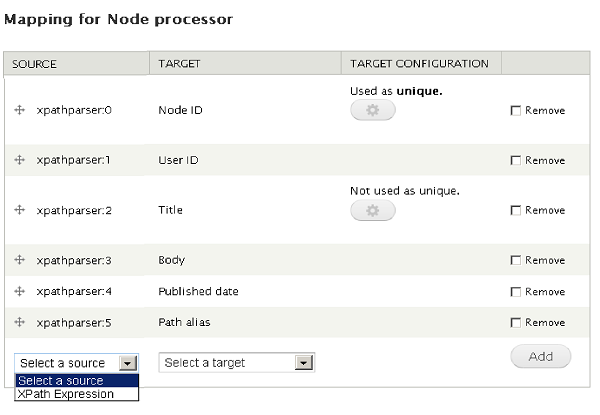
- "Node ID" and make it Unique
- "User ID"
- "Title"
- "Body"
- "Published date"
- "Path alias"
- Under "XPath XML parser", type in your XSL queries like this:
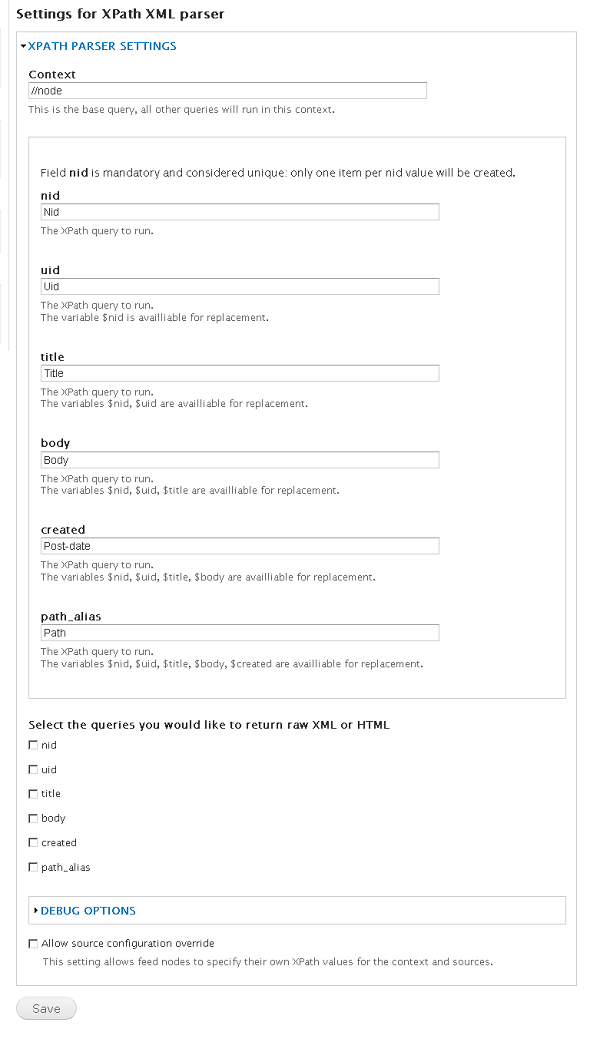
- Context:
//node - nid:
Nid - uid:
Uid - title:
Title - body:
Body - created:
Post-date - path_alias:
Path - At the bottom of the page, do NOT check any boxes under "Select the queries you would like to return raw XML or HTML", as this will wrap your field data in an extra <Body> tag.
- Context:
- Be sure to Save your settings.
Using your feed importer with Drupal 7

- Go to the
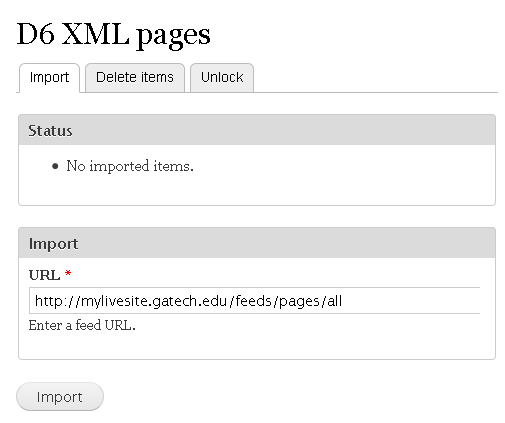
/importpage on your site (for example:http://mysite.gatech.edu/import) & choose the importer you just created (D6 XML pages). - In the Import > URL text box, enter the web address of the feed view you created earlier, for example:
http://mylivesite.gatech.edu/feeds/pages/alland click on "Import".
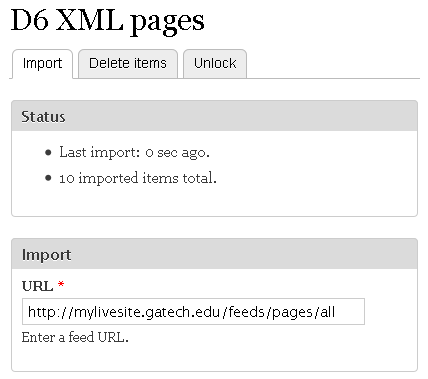
- Hopefully, you'll see a successful Status message that says something like "10 imported items total".
Quality assurance
- Do some sample checking of the pages you imported. Make sure your new pages are identical to those on the old site.
- Consider using Views Bulk Operations (VBO) as a great way to add tags or do mass corrections to this imported content in your new Drupal 7 site.

Comments
Adelle Frank
Going to update post with your feedback
Thanks, M, for giving such detailed feedback: I will update my post with your excellent additions!
Adelle
Date field Timezone problem
There is a known issue for Feeds, where it converts imported dates to GMT, even if they are in a UNIX timestamp format.
There are a number of workarounds right now, including the Feeds Tamper module, or setting your Content Type's date field to "UTC".
Dawn
Great resource! Attached files and images?
HI there - thank you for a very clear tutorial!
I'm wondering how you would handle adding multiple attached files?
I'm currently using Data Export module in D6 and it only outputs attached files as a comma separated list. Which would be fine if I could figure out how to get Feeds Xpath Parser in D7 to import these. I outlined the problem here http://drupal.org/node/1874380.
Is there a standard way to attach and migrate files using feeds?
thank you
Adelle Frank
Try Feeds Tamper module
Hi, Dawn:
I don't think there is a standard way to migrate attached files. I believe this should work, but I haven't had time to test. If you do try it would you let me know if it works?
[upload_fid-url]token into the textarea, so that the absolute link to this file is output in the XML feed. Be sure to choose a comma WITHOUT a space as the separator for multiple values.Adelle Frank
Text Find & Replace Solution (for small amounts of data)
Because Views Export as XML does NOT nest multivalued field values properly in parent/child tags, my co-worker, Matt came up with this Solution:
Use a text editor to replace <elements> in the exported XML. You can give those fields and their multiple values a parent/child structure manually.
Sean
More Resources
Hey,
I found this resource when looking into the same problem. The only difference is the example they run through is done with a CSV file. The process is identical.
http://prezi.com/g6chbltwdcbx/drupal-data-migration-made-simple-with-feeds/
Adelle Frank
Great resource!
Thanks, Sean :)